Once having made the decision to reduce waste and cut single use plastic from your life, the obvious will suddenly dawn on you that “oh my gosh, bread is in a plastic bag!” For me the realisation provoked a state of panic as I imagined myself slaving away in the kitchen baking loaf after loaf to keep up with the family’s demand. How would I have time to do this? Then I remembered that my mum had a bread maker that she didn’t use so I promptly payed her a visit and acquired a bread maker (thanks mum).
Problem solved right? Not quite. Breadmakers require ingredients. Ingredients come in packages at the local supermarket – at least that was the case until I found a store that sold bulk flour.

The problem is, there is nearly always a hidden plastic bag within the packaging. When I first bought a large ‘paper’ bag of bread mix I discovered a plastic bag sandwiched between two layers of paper! I did eventually find an all paper bag of bread mix but then I had to buy the yeast. Yeast, as far as I know is only packaged in foil plastic laminates or other unrecyclable packaging. Oh well can’t win them all. Nevertheless, I made significant reductions in the amount of waste generated from our consumption of bread.
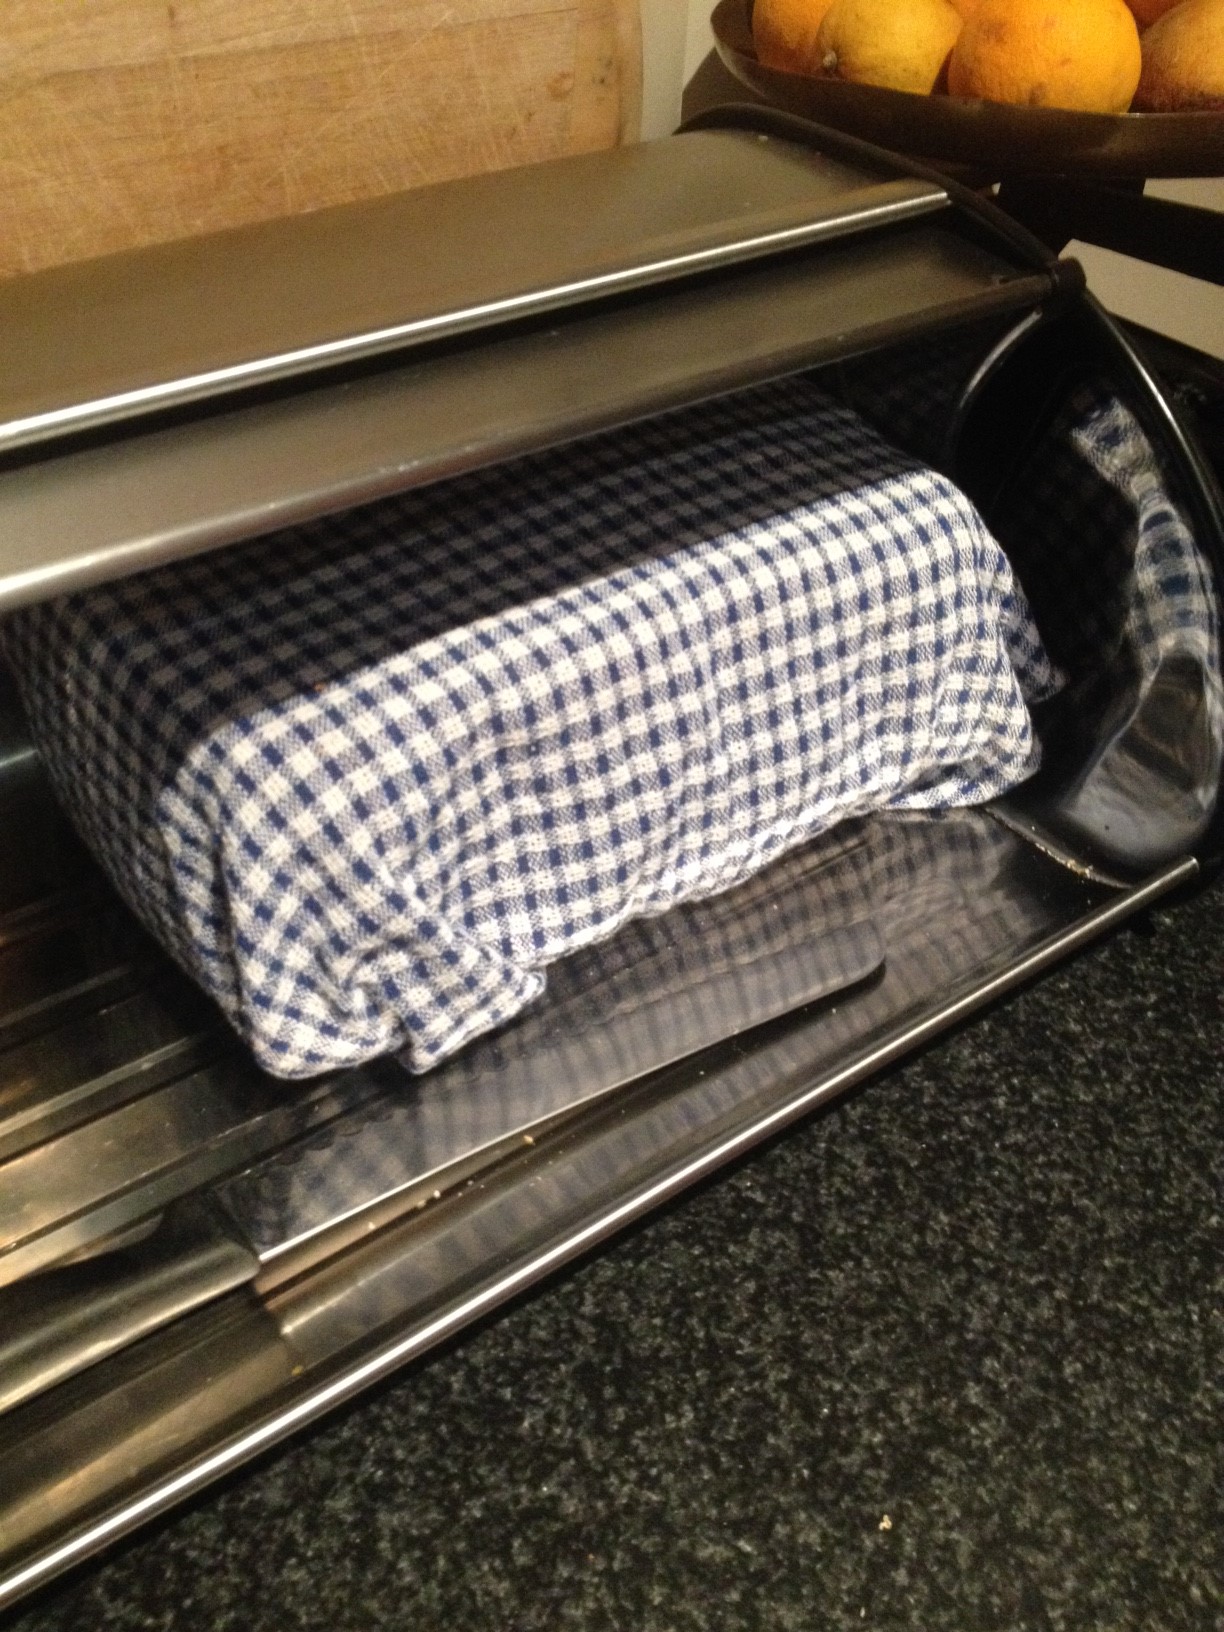
The breadmaker got a three month work out, with each loaf made wrapped in a clean tea towel and placed in the bread tin. Loaves were eaten within a day or two, so I never had to worry about freezing or stale bread. The crust of homemade bread is good at protecting loaves from going stale.
Unfortunately, after the initial excitement of yummy homemade bread, a couple of negatives appeared. The bread was too heavy and couldn’t be cut thinly for sandwiches. I persisted but the kids started coming home hungry with uneaten sandwiches. It was time to find another solution.
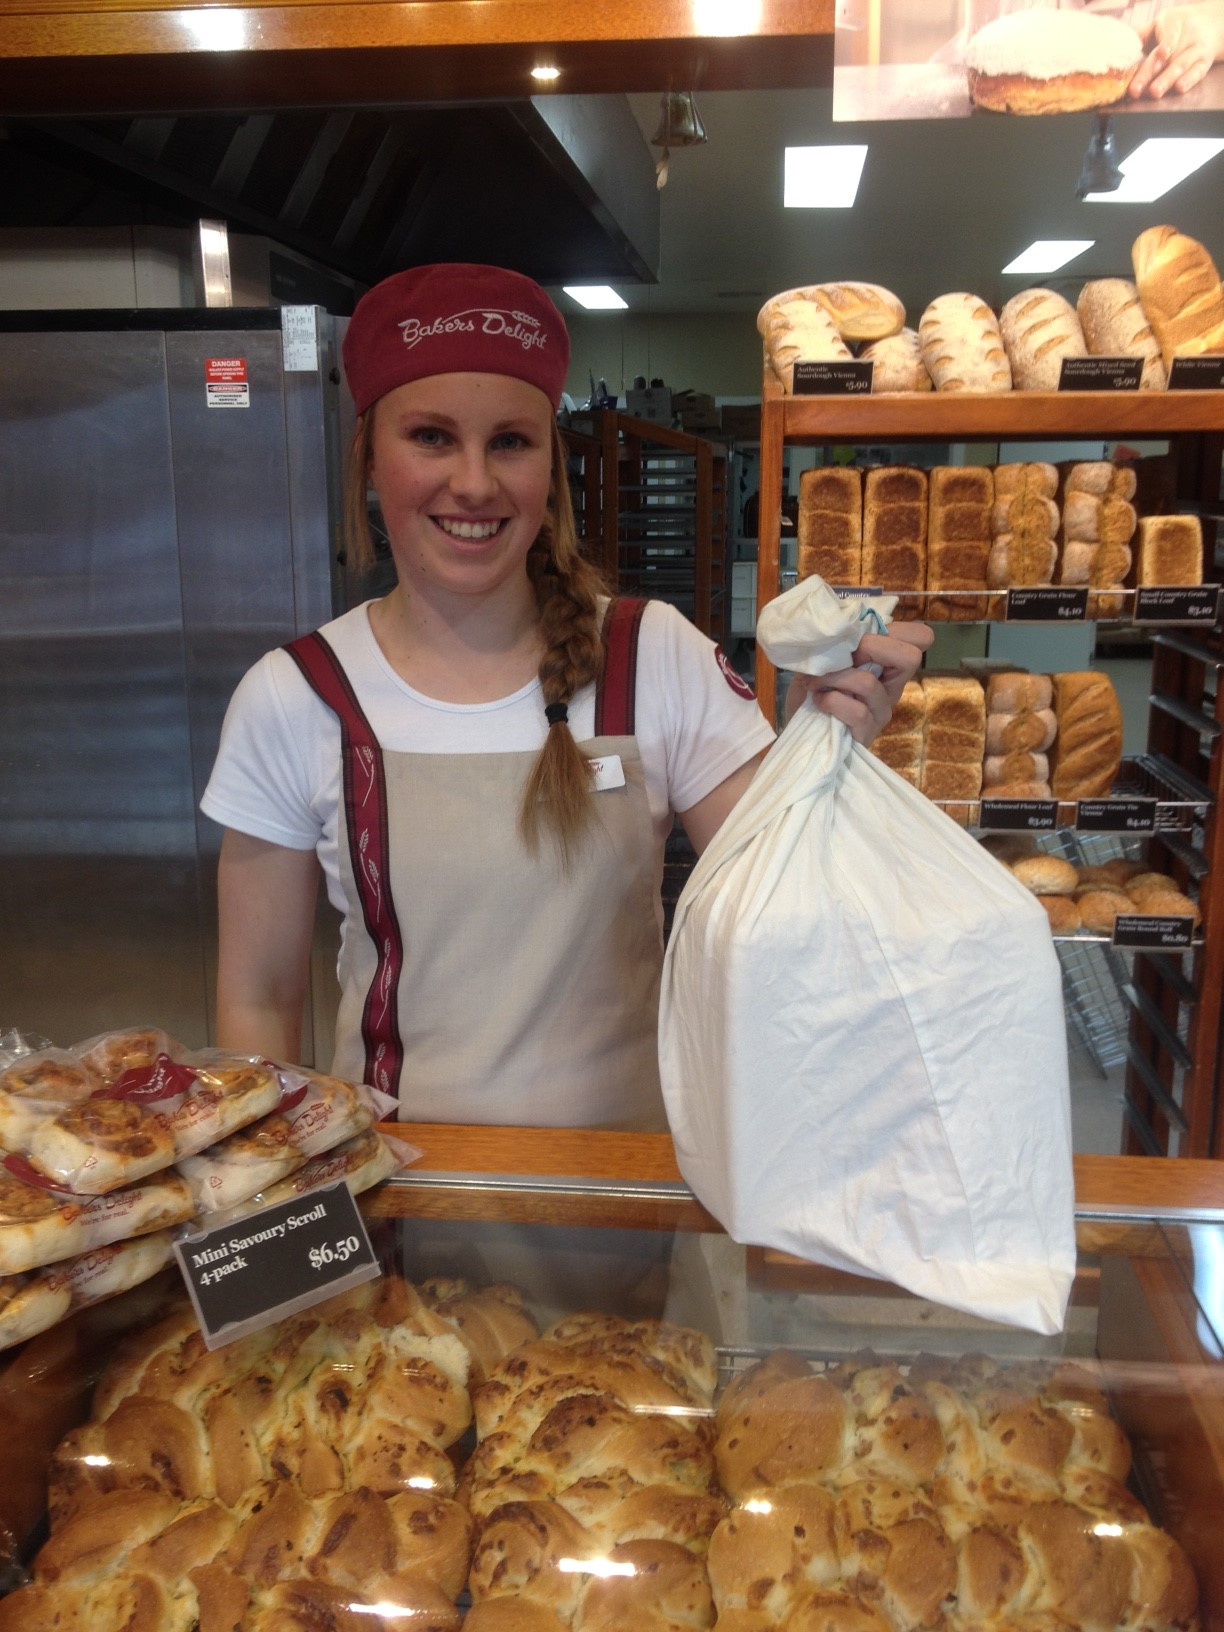
I decided to buy our bread direct from the baker. Initially I used a pillowcase because that’s all I had and I don’t like buying new things if I don’t have to. I could fit four loaves in each pillowcase. To freeze, I put the pillowcase of bread straight into the freezer but it was a bit awkward to manage so I made individual bread bags. The assistants at all the bakeries I go to love these because they can slice the bread and slide it straight into the cloth bag in exactly the same way as they would with a plastic bag. It is also easier to manage the bread from the freezer to the bread tin at home.
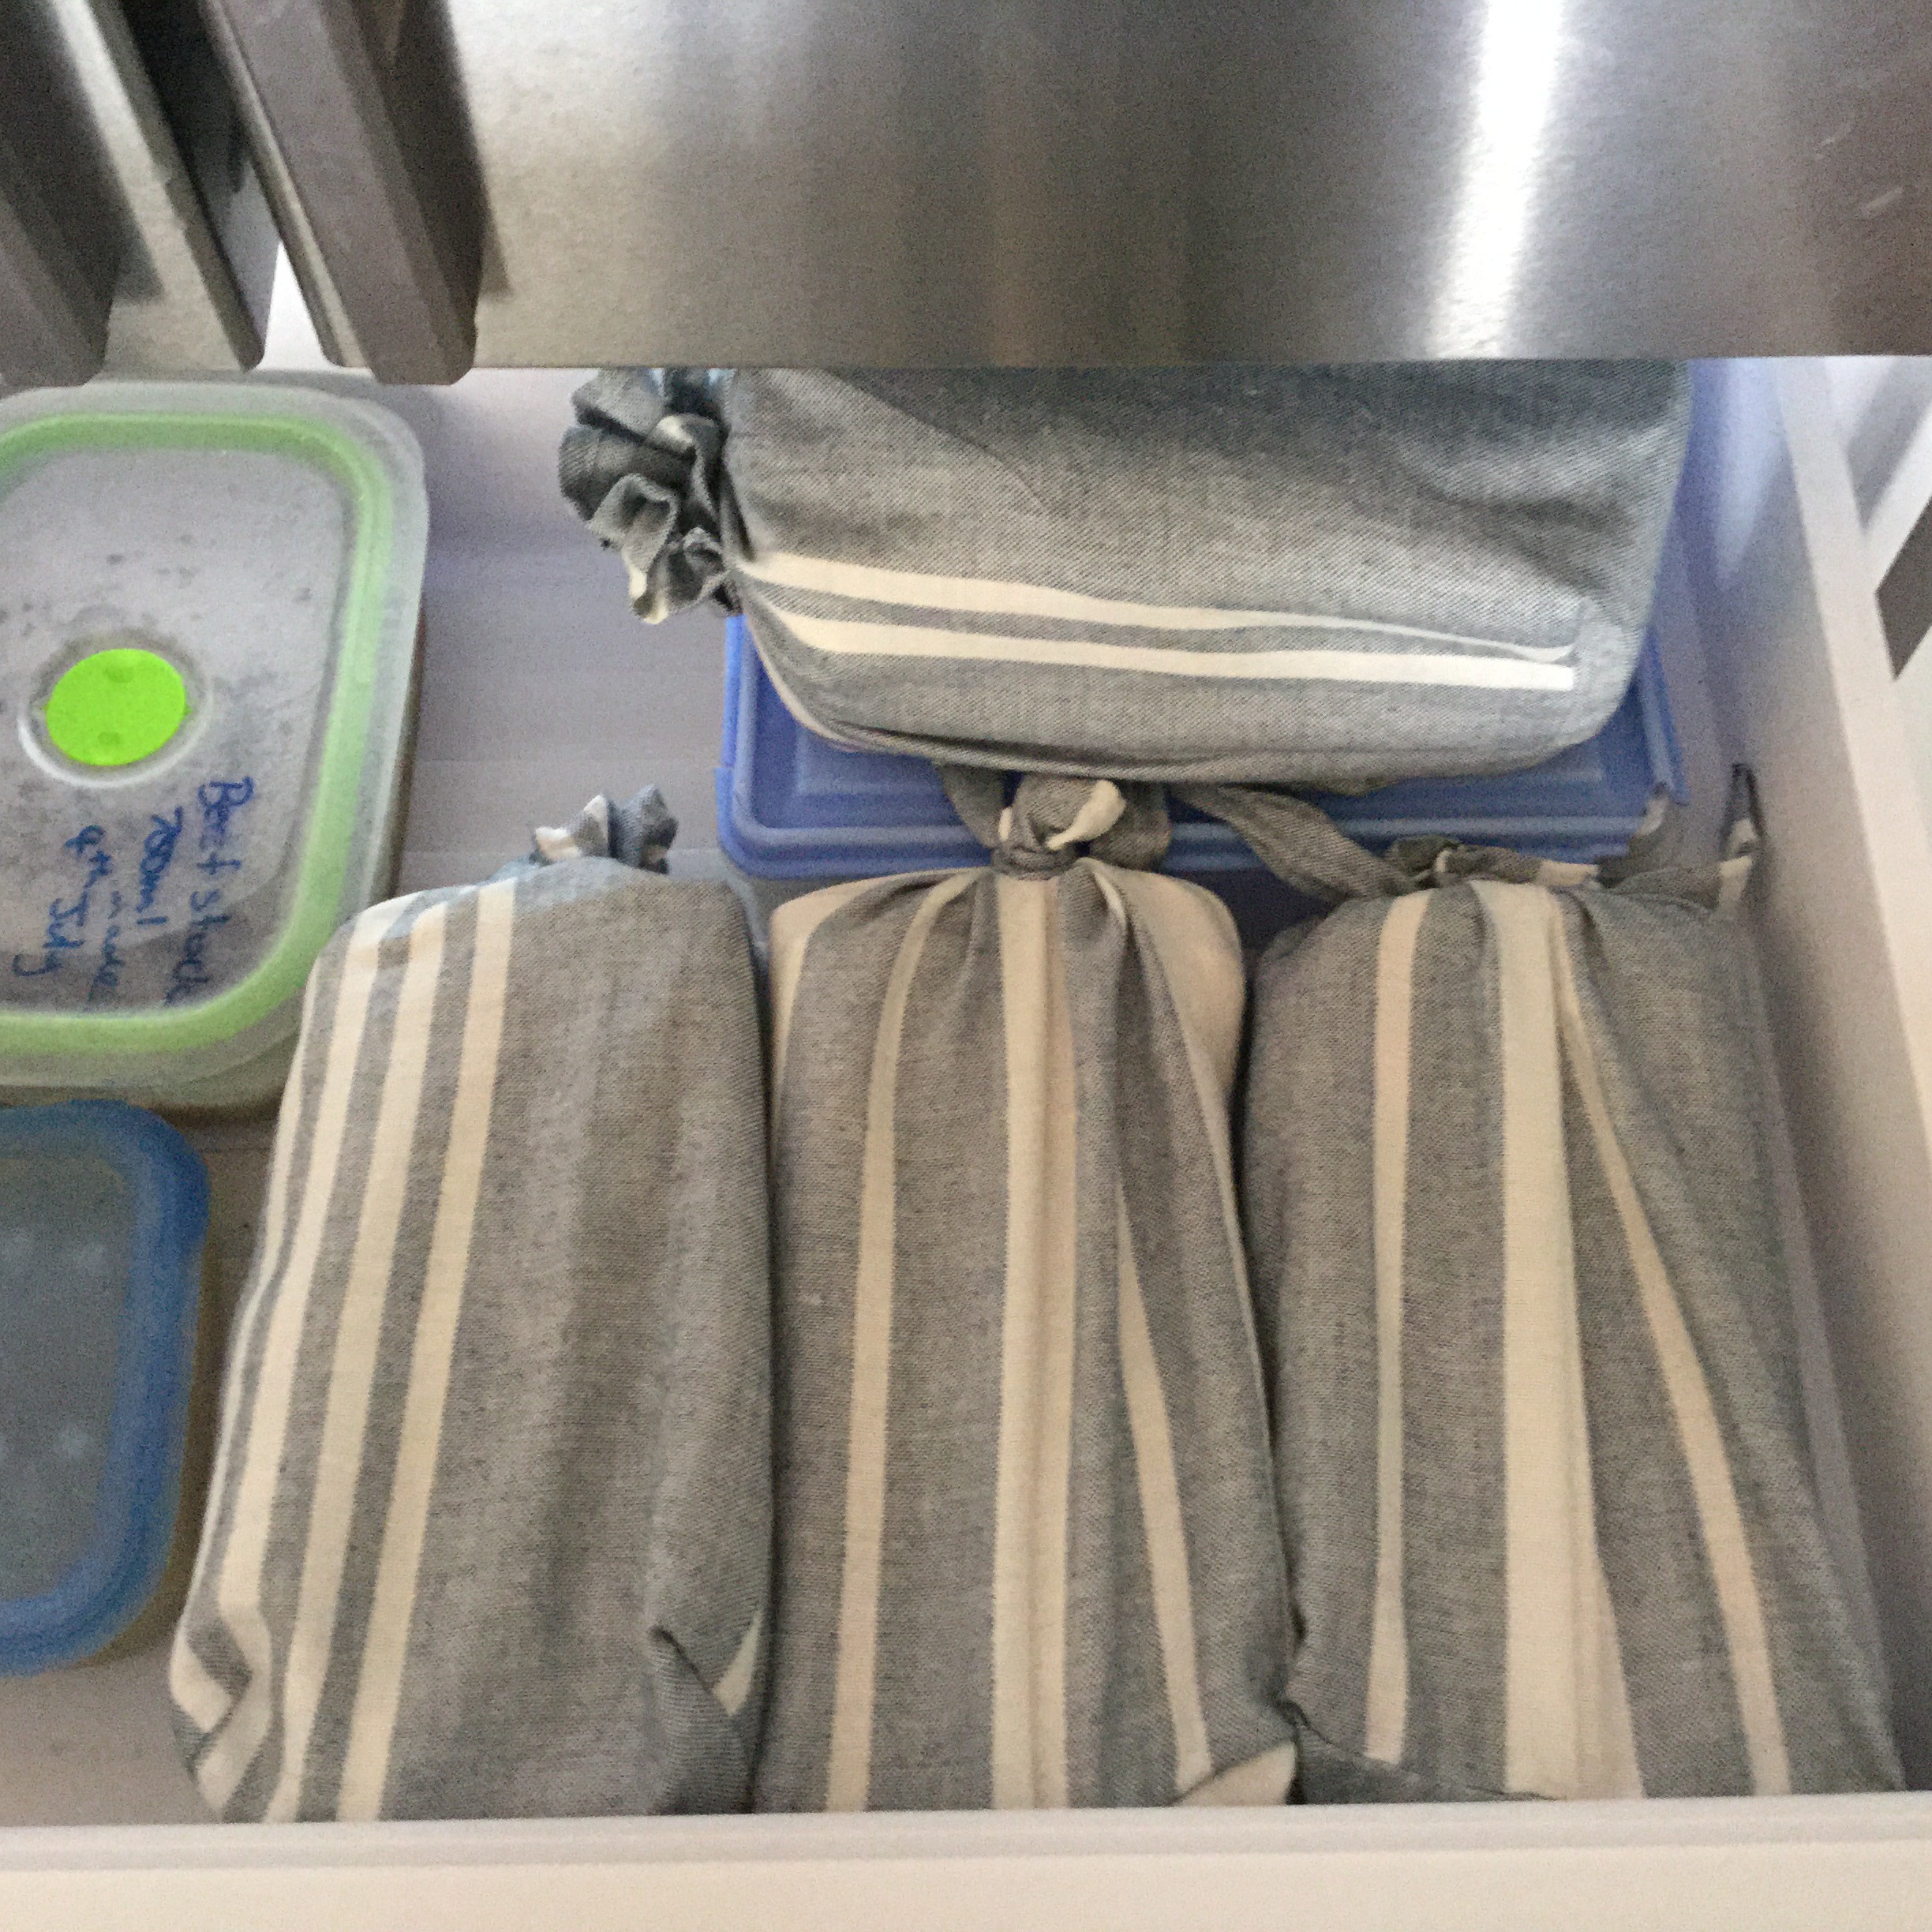
I’ve read a lot of different advice about the best way to store bread but I haven’t noticed any difference at all between my bread stored at room temperature or frozen in a cloth bag and the store bought plastic wrapped bread. The longest a loaf stays in the freezer at our house is two weeks.
When I first started doing this the bakers were so surprised, telling me they have never had anyone collect their bread in a cloth bag before. Now they are telling me that others are bringing in pillowcases and cloth bags, and I am also getting really positive comments about them from other customers. Go ahead and give it a try. The more of us that do it the more normal it becomes, just like the green bags in the supermarkets. If you need a little more encouragement I filmed myself at the baker, which you can watch below.
Make your own bread bags
If you are new to sewing (like me) but want to have a go at making your own bread bags, check out how I did it below.
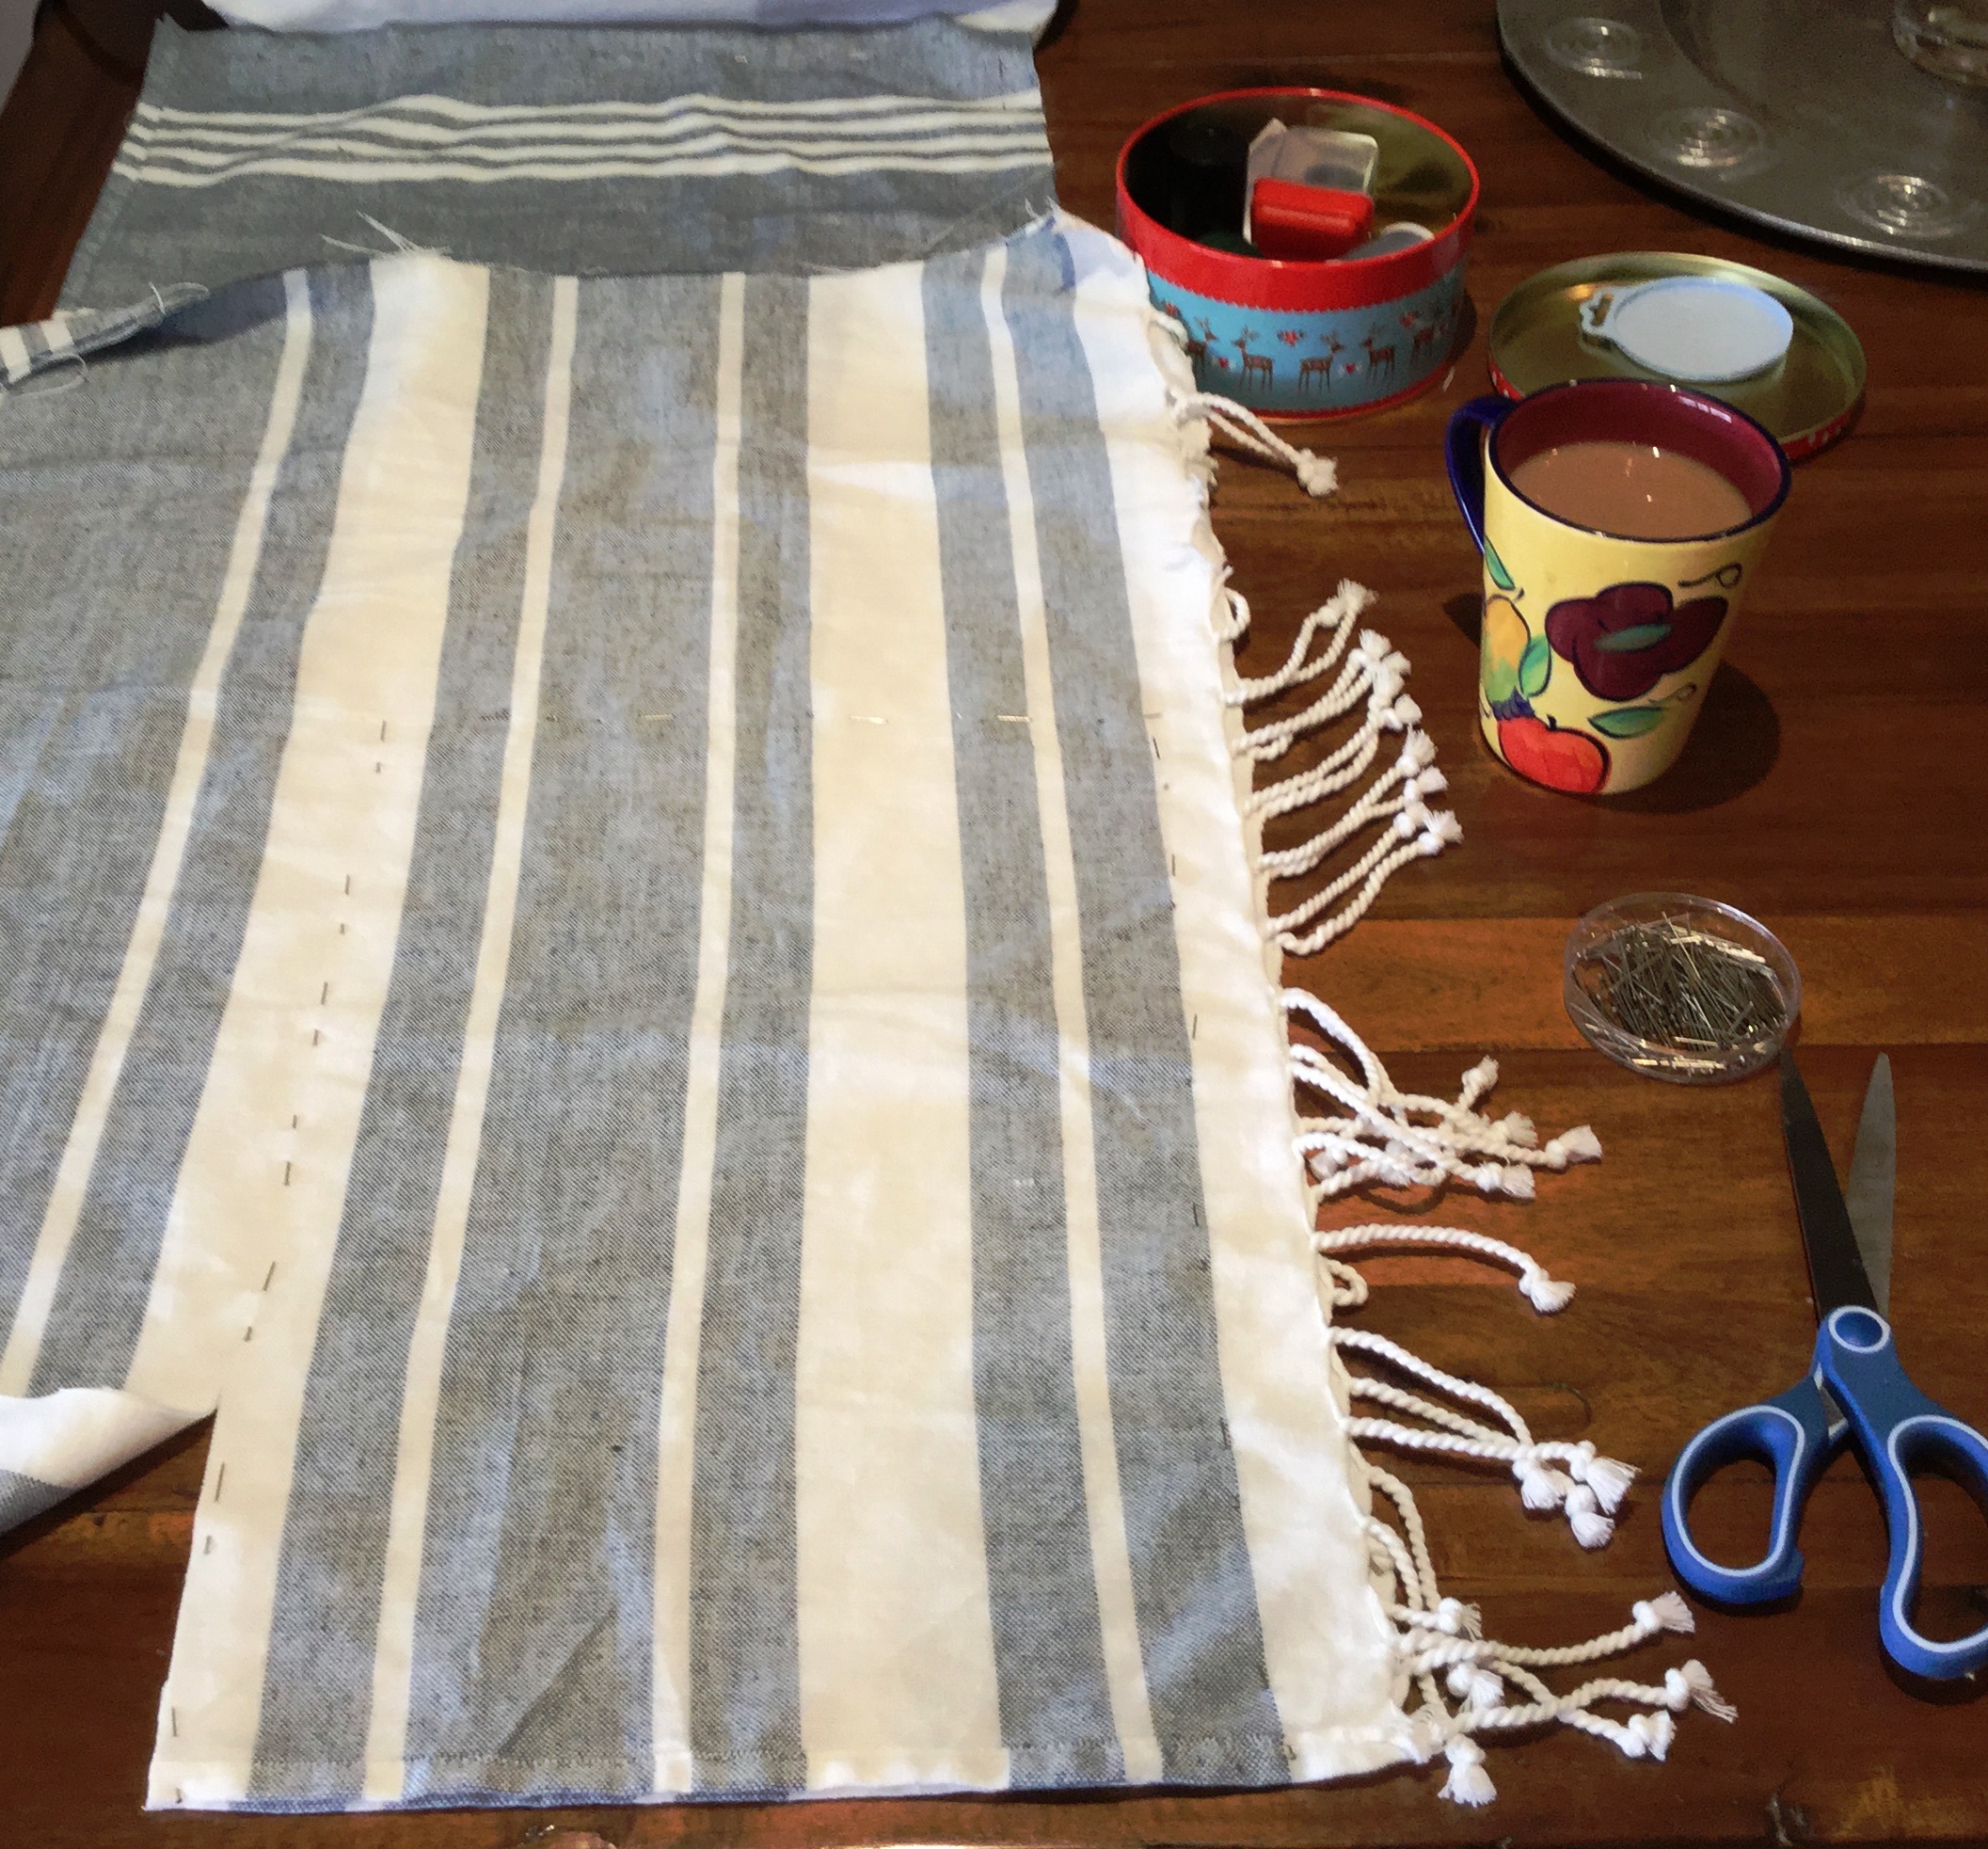
I had this beach towel – that is actually more like a scarf or shawl – that I had never used. I thought the material and pattern would work well for bread bags.
Make sure your material has been pre-shrunk and cut out rectangles the size of 13 inches by 17 inches. Stitch them together inside out. Don’t forget to hem your open ends if your material doesn’t already have a hem you can use.

To give the bag a square bottom, manipulate the bag so that the seam runs vertically down the middle. Fold the ends so that they form a triangle.
Next I fold each side of the triangle back up so that the point meets the bottom of the triangle.
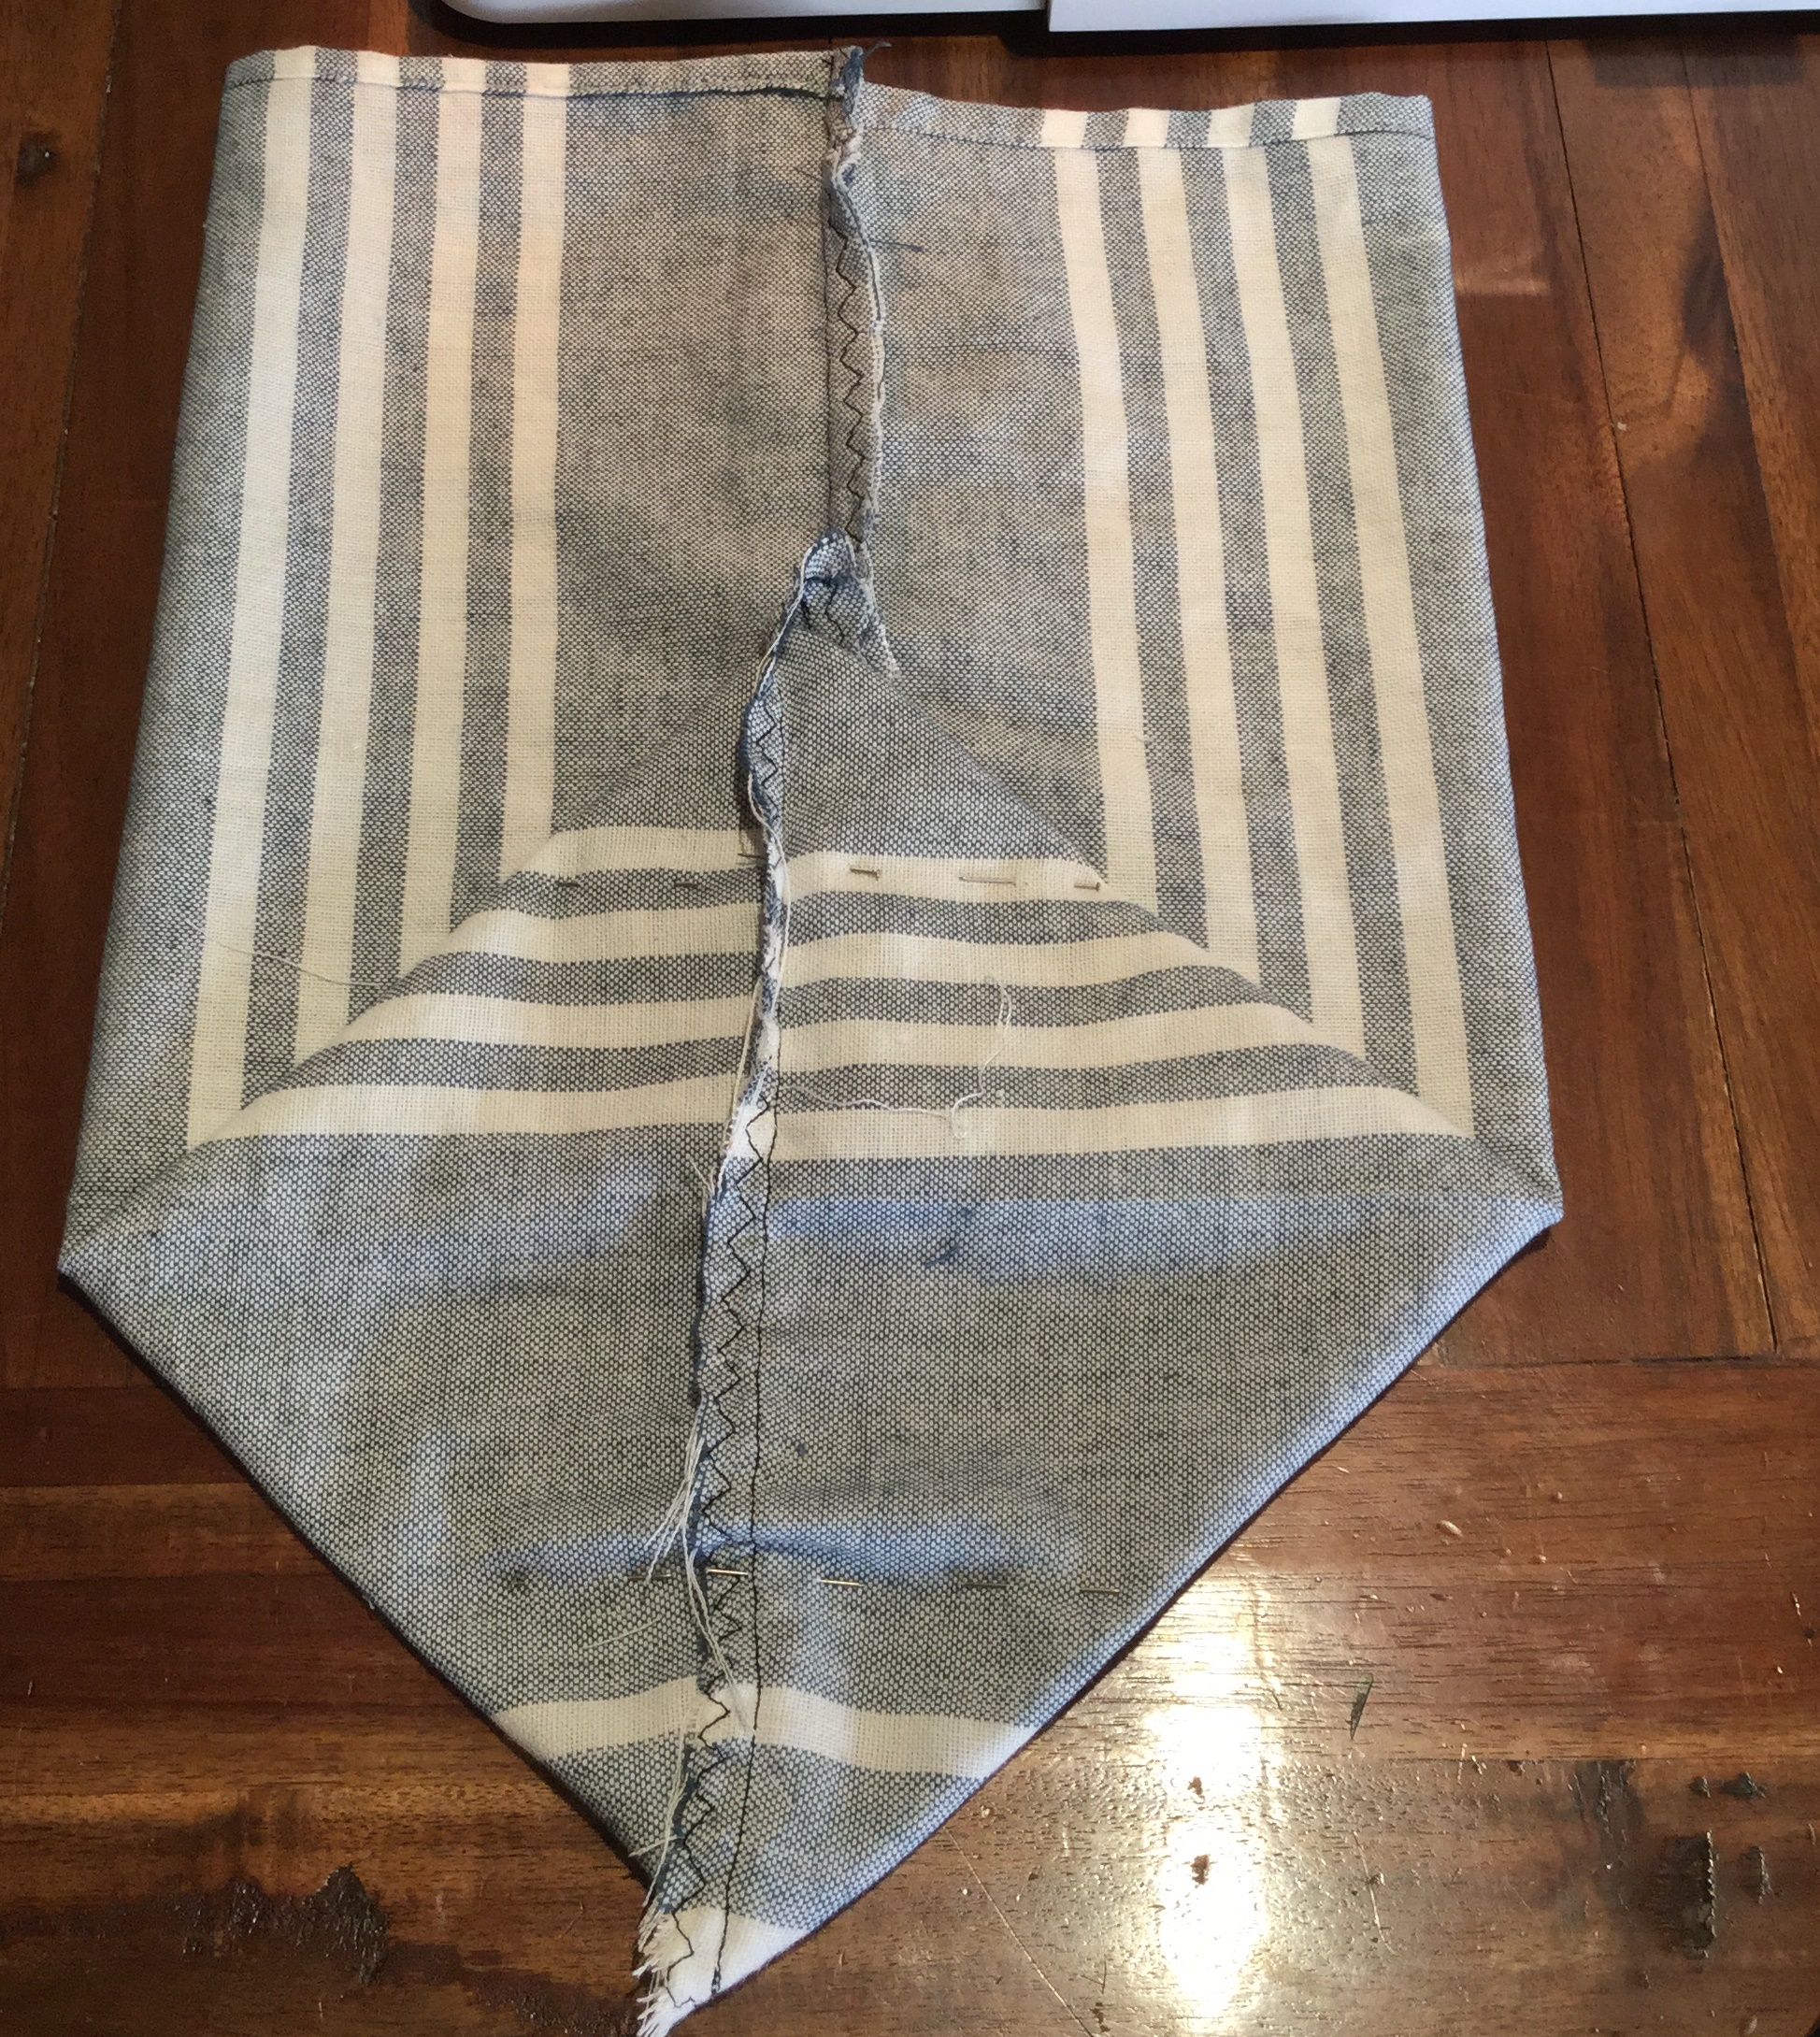

Mark the fold with pins, stitch across the fold, and then trim the corner off. Repeat on the other side. You will be left with a square bottom once you turn the bag right way out.


Next sew on a scrap piece of material or cord to tie the bag securely. I did not use a drawstring to close the bag because it is not as airtight. Your bag is now complete.


83 thoughts