Having a glut of apples this year inspired me to make my own real apple cider vinegar.
I didn’t have anything to lose as the apples were essentially wild and not going to be used until I collected them (there are lots of wild apple trees around our parts, many along roadsides making them easy to forage), and trial and error is the best way to learn!
I tried making scrap apple vinegar several times a few years ago but mostly grew mould, and besides that, we never have apple scraps. Thinking back, the mould might have grown during the time I was waiting for a mother to form and perhaps I could have used the liquid as vinegar prior to this, but my memory is fuzzy now.
Nevertheless, scrap apple vinegar is a lower quality product than ‘real’ apple cider vinegar and doesn’t taste as good. I wanted to see if I could make a higher quality product with a ‘mother’ that I could continue to use in the future.
To do this I started by using the juice from the apples, not apple scraps. I used some of the pulp from juicing to bake an apple and date loaf and the rest of the scraps went over the back fence to our landlord’s cattle.
The above video was the first I watched (provided to me on Facebook) to get my head around what I needed to do and which led me to understand that making vinegar involves two distinct fermentation processes. Failing to recognise this is a major reason for failing to make vinegar (could be the reason why my scrap apple attempts failed).
The science of making vinegar
Vinegar is a living ingredient created through the process of fermentation. It’s not difficult to make vinegar, it simply takes a bit of time (waiting) rather than much of your attention. In short, the following steps must be followed to make a high-quality cider vinegar:
Step 1. Make apple juice from ripe apples.
Step 2. Convert all of the apple juice sugar into alcohol through yeast fermentation. This is the first fermentation process. You now have apple cider (hard apple cider if you live in America).
Step 3. Convert all of the alcohol into acetic acid using bacteria (Acetobacter aceti). This is called acetic acid fermentation and is the secondary fermentation stage. You now have apple cider vinegar.
Step 4. Store your vinegar.
The steps in more detail
Step 1
Wash apples in cold water to remove debris and cut off any bad bits. Use a juicer or apple press (String and Salt have them for hire) to make the apple juice. Make sure your equipment is clean too.
Step 2
You don’t have to add yeast to begin the fermentation of fruit sugars into alcohol because there are wild yeasts all around us all the time. Sometimes you can see the yeast on foraged apples as a thin white coating. Even if you can’t see it, the yeast is still there.
You can add commercial beer, wine or champagne yeast if you would like to speed up the process and have more certainty of flavour and alcohol concentration, but I let the wild yeasts do their job because I had made wild apple cider before and was confident in that process and the flavour.
Yeast fermentation of sugar into alcohol is an anaerobic process which means fermentation has to occur without oxygen.
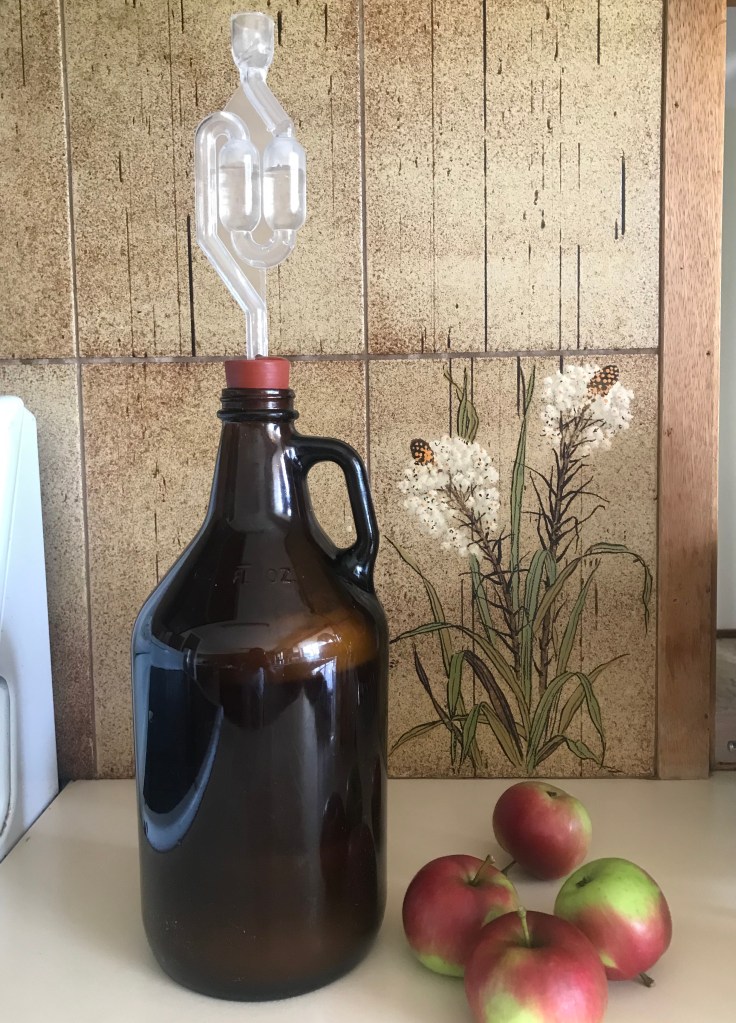
I used my growler as my fermentation chamber instead of a demijohn, but you can use anything that you can seal and add an airlock to. The reason you need an airlock is so that the carbon dioxide produced during the yeast fermentation can escape without oxygen getting in. If you don’t allow the carbon dioxide to escape you risk an explosion.
Add a little bit of water to your airlock so that it is filled to half way. Leave on the counter for a few days to a week. During the fermentation process small bubbles will appear on the side of the glass and the juice may rise because of the increasing carbon dioxide.
After a week, when there is no activity in the airlock, yeast fermentation has finished and you now have alcoholic apple cider.
Step 3
This second fermentation stage of using acetic acid bacteria (Acetobacter) to convert all of the alcohol into acetic acid is an aerobic process so it occurs in the presence of oxygen.
I transferred the cider into a wide-mouth jar (glass is the best container to use as the acid produced can corrode some other materials), leaving out the sediment that had accumulated at the bottom of the growler.
Now, once again we don’t have to add anything because strains of acetobactor are present all around us all the time and will convert the alcohol into acetic acid over a few weeks. However, if you want more control over the flavour of your vinegar you can inoculate it at this stage with some unpasteurised vinegar with the mother, for example the Bragg brand from the store or a previous homemade batch of vinegar. This also speeds up fermentation. A couple of tablespoons to ¼ cup would be enough to get things going in one litre of juice.
I decided to inoculate my apple cider with Bragg Vinegar from the store so that I got off to a good start.
Cover the jar with something like cheesecloth or a sterilised handkerchief that will allow oxygen in but no fruit flies or anything like that. Secure it with a rubber band.
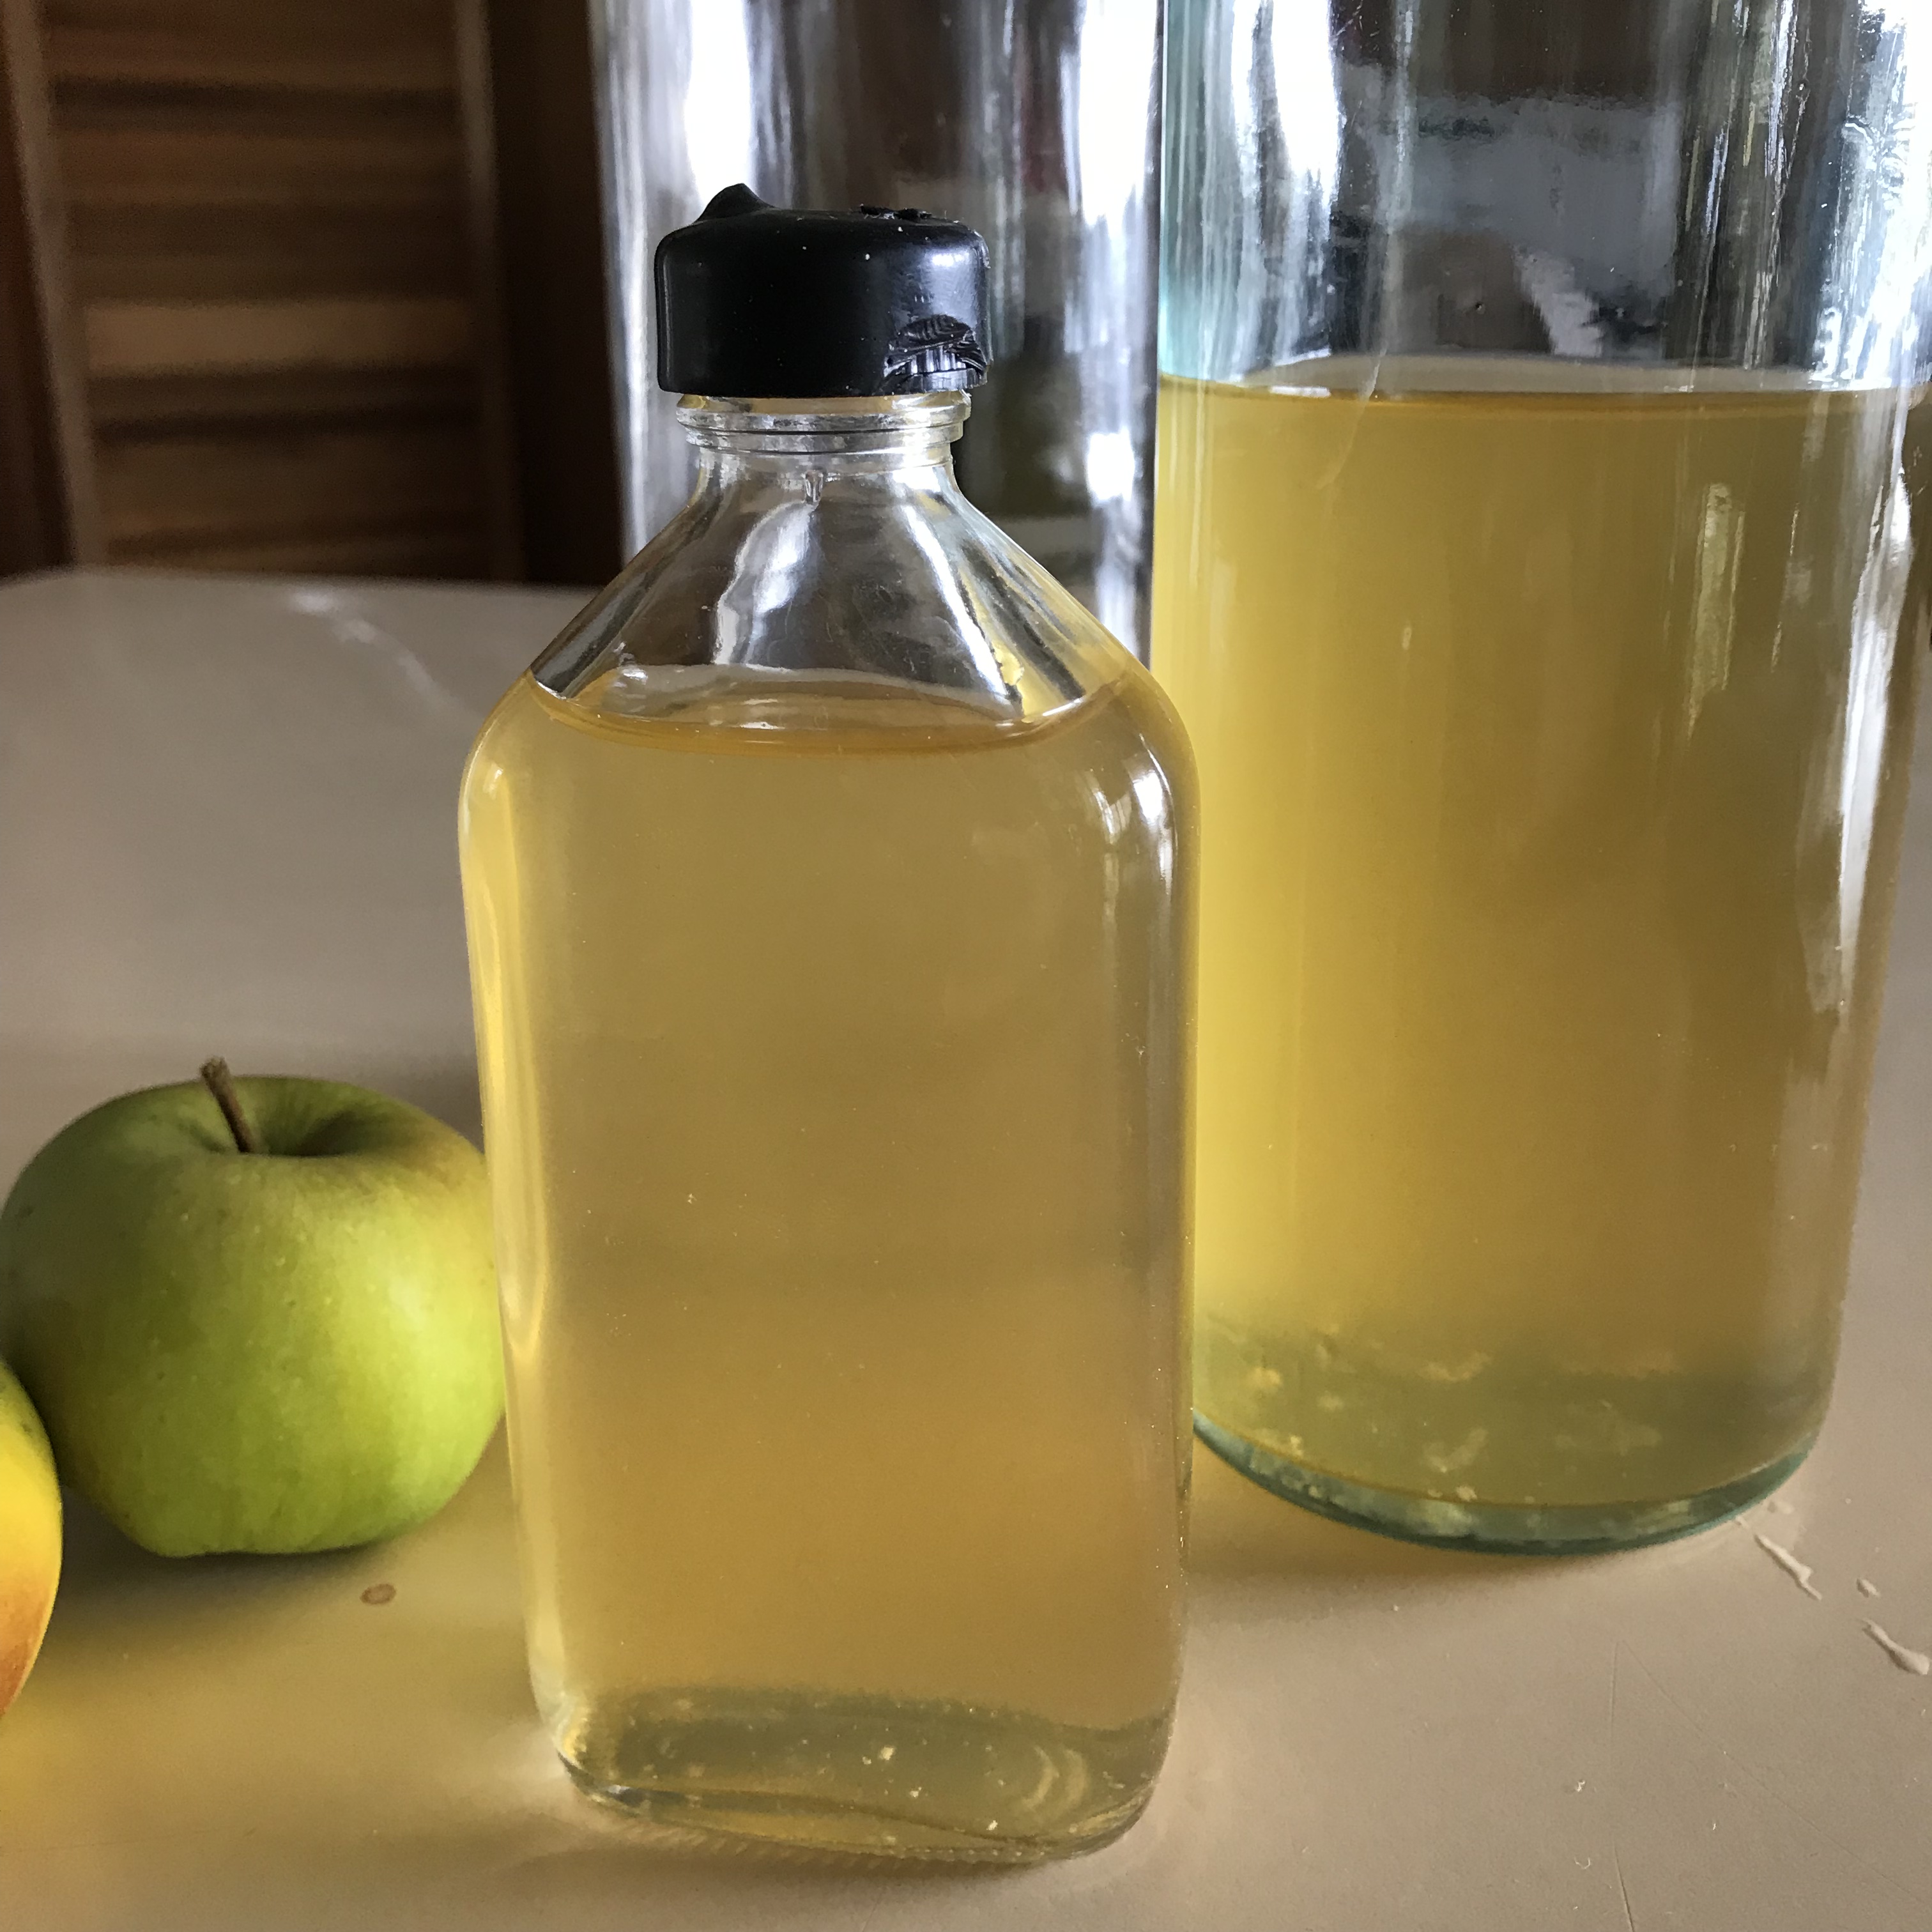
Store out of direct sunlight at room temperature, undisturbed for about 3 to 4 weeks (it could take longer in cooler temperatures). Over time it will begin to smell more acidic, until it smells like strong vinegar. The volume of liquid will probably reduce due to evaporation. The finished liquid will be clear and there will be sediment (yeast) on the bottom and a mother forming on top.
You now have apple cider vinegar.

Step 4
The vinegar is now ready for storage in separate, capped containers in your pantry or refrigerator.
If a mother has developed you can take this out and use it to make future batches of apple cider vinegar or other types of vinegar. See this video on storing the mother.
You don’t have to filter out the sediment on the bottom of the jar, it’s edible, but otherwise you can filter with fine cheesecloth or a coffee filter, or just carefully pour it into your storage bottle.
Pasteurisation is an option for almost indefinite storage but most people want the health benefits of raw apple cider vinegar. I’m not pasteurising my apple cider vinegar.
Enjoy!


We love making cider and apple cider vinegar also. The first year we crushed 500 apples with a wooden mallet type object my husband (Darren) made and a bucket. The following year we sourced a whole tree of free apples and Darren made a wooden, hand turned crusher. He found a pattern on the web for the crusher. The process still took hours, but very satisfying. We use the crushed pulp that is left over from the juice, (juice becomes cider), cover it with water, add a splash of raw apple cider vinegar for the mother, a bit of sugar and make the vinegar.
LikeLiked by 1 person
Homemade stuff is definitely very satisfying! I’ve been thinking that making some sort of homemade apple press is a good project to keep my son busy in the school holidays. Unfortunately my three attempts at scrap apple vinegar haven’t been successful. Do you find the end product very strong?
LikeLike
The final product is not very strong, nothing like white vinegar, so not as effective as a cleaning tool. The vinegar is good for salad dressings.
LikeLike
Excellent explanation of the process. Thanks.
LikeLiked by 1 person