It’s almost my five year blogging anniversary and one of the first posts I uploaded was about a cubby house we built from salvaged and second hand materials. It was a beauty and something we were very proud of but it became a nightmare to bring it with us each time we moved house, so regrettably it was left behind at one point.
Leaving it behind didn’t seem so bad to begin with as the kids seemed to be out growing cubby houses, however the increased time at home since March has revived a lot of imaginary play by the kids. Its been nice to see actually. One of the things that emerged was that my daughter was attempting to make lots of huts throughout the garden and also wanted a cubbyhouse. Initially I was reluctant to do anything about it in case it was a short phase but she was persistant.
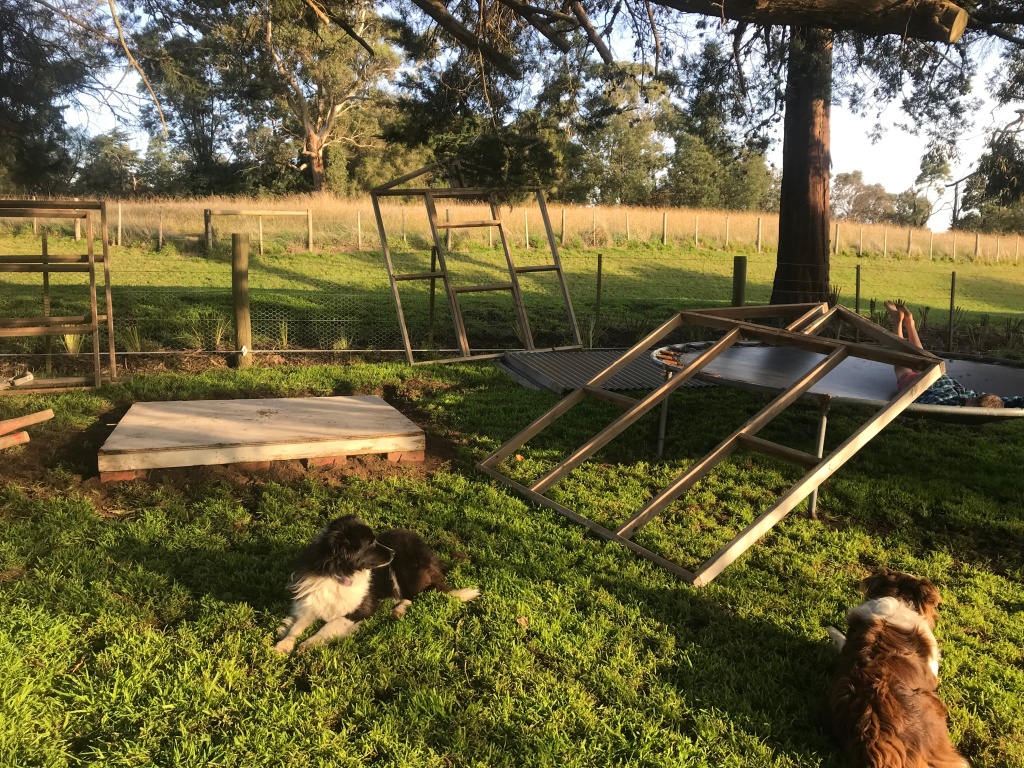
One day we were at my in-laws home to deliver firewood and they said there was an old garden shed frame in the big shed if we wanted it. I instantly thought that was a great opportunity to get started on a cubby house so we back loaded the trailer with the wall frames, roof panels and a floor. They mentioned they had only paid $2 for the whole shed at a clearance sale.

Once at home I set about preparing a site and getting the floor as level as possible. Then I rejoined all the wall frames. The roof wasn’t coming together well for me so I decided to leave it until later.

I thought it would be quick and easy to put some sort of material over the frames but it required a lot of patience as I discussed different options with my daughter and trawled Marketplace for secondhand material. We decided we would use corrugated iron and it was my in laws who came to the rescue again by finding a small amount of free corrugated iron near them. They also picked it up and delivered it to me which saved me heaps of time and allowed me to get on with it.

I was unsure how to use the iron to begin with because some of it was coloured blue on one side. I just decided to get started by laying the sheets of iron horizontally, and as I went along I worked out that I could use all the coloured iron on the back wall so that from the outside it would match the silver iron on the side walls but it would result in a blue feature wall on the inside. Sometimes I can’t believe how lucky I am when things come together like that, and when I have just enough to finish the whole project with very little leftover. I used a combination of hand sheers and an angle grinder to cut the iron to correct sizes.


In terms of lighting, the roof has a panel of old Laserlight in it so there is a skylight but I also had enough offcuts of new Laserlight from the roof of the glasshouse we’re building to cover the triangular sections under the roof on the front and back walls. Finally, the back wall frame contained a space that looked like it was meant for a small window so I took a glass pane which I had collected for free through Marketplace, cut it to size, put it in place and framed it so it wouldn’t fall out.
Next I decided to tackle the roof again. I ended up removing and replacing some rotting wood and somehow managed to saw my angles well enough for the two side of the roof to join together in the middle. That was a total fluke as it was all guess work. The timber was also obtained secondhand through Marketplace.


Throughout the whole project I had been searching for hardwood fence palings that didn’t cost a fortune to cover the sharp corners of the building and I finally found some – again through Marketplace. I have to say I end up on some fairly knarly adventures when using Marketplace. In this instance, when I collected the hardwood, I ended up bogged in a sheep paddock, when I collected the glass window pane I was asked if I was there for drugs (!), and then there is the occasional exchange when things don’t turn out to be what you think they are, such as the massive bluestone pitchers I ended up with (probably hand carved by convicts) instead of the little bricks I thought I was buying. Sometimes it works in my favour. The bluestone pitchers have become stepping stones into the cubby.

By the time I’d finished covering the corners with hardwood palings I was totally in love with the cubby and decided it just had to be topped off with a stable door made from more hardwood fence palings. The ability to have the top section open would be like having another window, it would allow a breeze in hot weather and it would facilitate shop keeper games and so, and besides, I thought it would look fantastic.


I added some extra flourishes such as an owl I bought from a nursery, flags I made from scrap fabric that I got from the op shop last year, a mailbox I found at a junk yard, some planter boxes I made from more of the hardwood palings, and a couple of kokedamas we made after watching an episode of Gardening Australia. I have more ideas but I decided I had to actually stop somewhere and say “it’s finished!”


Even though I got so much secondhand and so much for free, I still had to buy screws, nails, the door bolt, door hinges, and pay for fuel to pick items up, but the cost is still significantly cheaper than purchasing a ready-made cubby and it has so much more character.

Best of all for me is that I can look at it and say I made it all on my own without another adult or a YouTube instructional video. I enjoyed the challenge and my kids are pretty impressed too.


I love everything about this Tammy! Seems longer than 5 years. I can recall when you started and was very excited. Golly you have gone ahead in leaps and bounds, you deserve a big pat in the back. If ever you decide on another project, we have loads of corrugated iron going begging. Cheers, M.
LikeLiked by 1 person
I think I packed a lot into the first few years, lol. It’s been great getting to know you over the years and to have your support from the very beginning, so thank you. xx I might take you up on the offer to grab some corrugated iron as one of the next things I need to build is a sheep shelter in the orchard. 🙂 I will let you know.
LikeLiked by 1 person
Please do!
LikeLike
Your kids will spend lots of time in this wonderful cubby, Great work.
LikeLiked by 1 person
Thanks. Its been fun to see what they pretend to play in there. Its been a cake shop and they’ve pretended to be real estate agents selling it (I was a bit worried about the meaning behind that, lol), and last night I was told it was going to become ‘The Repair Shop’ which is a TV series on the ABC at the moment that we enjoy watching.
LikeLiked by 1 person
Kids have such great imaginations.
LikeLike